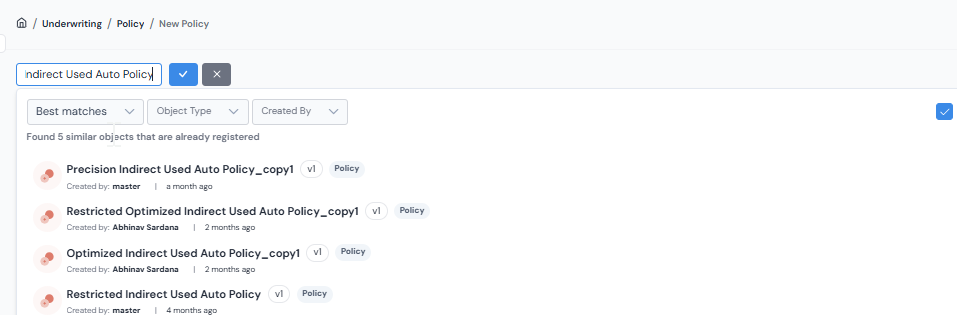
Create a Policy
Policy (Prospecting, Underwriting, Customer Management) is the module where you design and manage decision workflows that govern how applications are evaluated across the customer lifecycle: from prospecting and loan decisioning to ongoing customer management.
With Policy Registry, you can:
- Define end-to-end decision flows covering approval rules, offer generation, filtering, and optimization for products like credit cards, auto loans, and personal loans.
- Run Simulation jobs to test your decision logic against real-world data and review results in built-in dashboards.
- Use Single Record Review to trace exactly how a specific application moved through your workflow: which rules passed or failed, what offers were generated, and more.
- Run Comparison jobs to simulate champion-challenger scenarios and refine your strategies as market conditions evolve.
How Decision Workflows Are Structured
Every policy is built around a Decision Workflow: a sequence of blocks that define each step in your evaluation process. The standard flow for an underwriting policy looks like this:
- Evaluate whether the application meets your credit criteria (Application Decision).
- If approved, generate a set of offer combinations (Offer Creation).
- Calculate any derived values needed from the offer parameters, such as APR or monthly payment (Derived Variable).
- Filter out offers that don't meet business or product rules (Offer Filtering).
- Optionally, auto-select the best offer based on a defined goal (Offer Optimization).
There are five block types available when building your workflow:
| Block Type | What It Does | How Many Allowed |
|---|---|---|
| Application Decision | Define rule-based logic to approve, deny, or send applications for manual review based on criteria such as FICO score, DTI, and bureau data. | Multiple |
| Offer Creation | Configure the parameters for generating offer combinations, such as loan amount, interest rate, and term. | One (optional) |
| Derived Variable | Compute policy-specific values from offer parameters (for example, APR or monthly payment) that can be referenced in later blocks. | Multiple |
| Offer Filtering | Apply business or product rules to remove ineligible offers, for example partner restrictions or maximum loan limits. | Multiple |
| Offer Optimization | Evaluate all generated offers against a defined goal (such as maximizing return) and select the best-fit offer. | One (optional) |
Tip
Offer-related blocks are only available after you have added an Offer Creation block.
How to Create a Policy
Step 1: Choose the Right Module
Navigate to the module that matches your policy's purpose:
- Prospecting: for identifying individuals to target with pre-approval offers or mailers.
- Underwriting: for loan application approval or denial workflows.
- Customer Management: for generating personalized offers for existing customers.
Click + New Policy to begin.

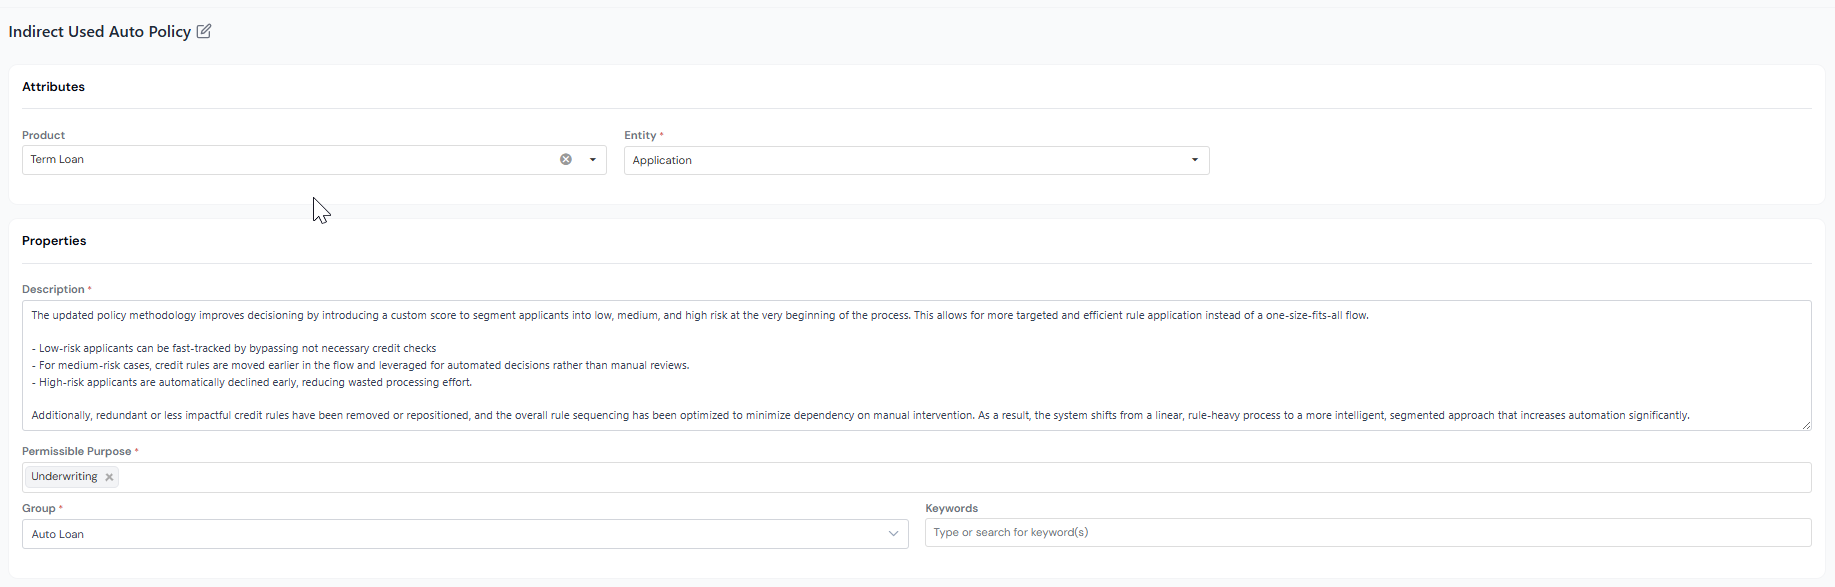
Step 2: Add Metadata
Give your policy a name and optionally add a Description and Group to help your team organize and find it later.

Step 3: Build Your Decision Workflow
This is where you design the logic your policy will execute. See the next section for a full walkthrough.
Building Your Decision Workflow
When you open the Decision Workflow tab, you'll see a canvas with + to edit.
Note
Toggle Edit Mode on at the top of the page to add or modify blocks.
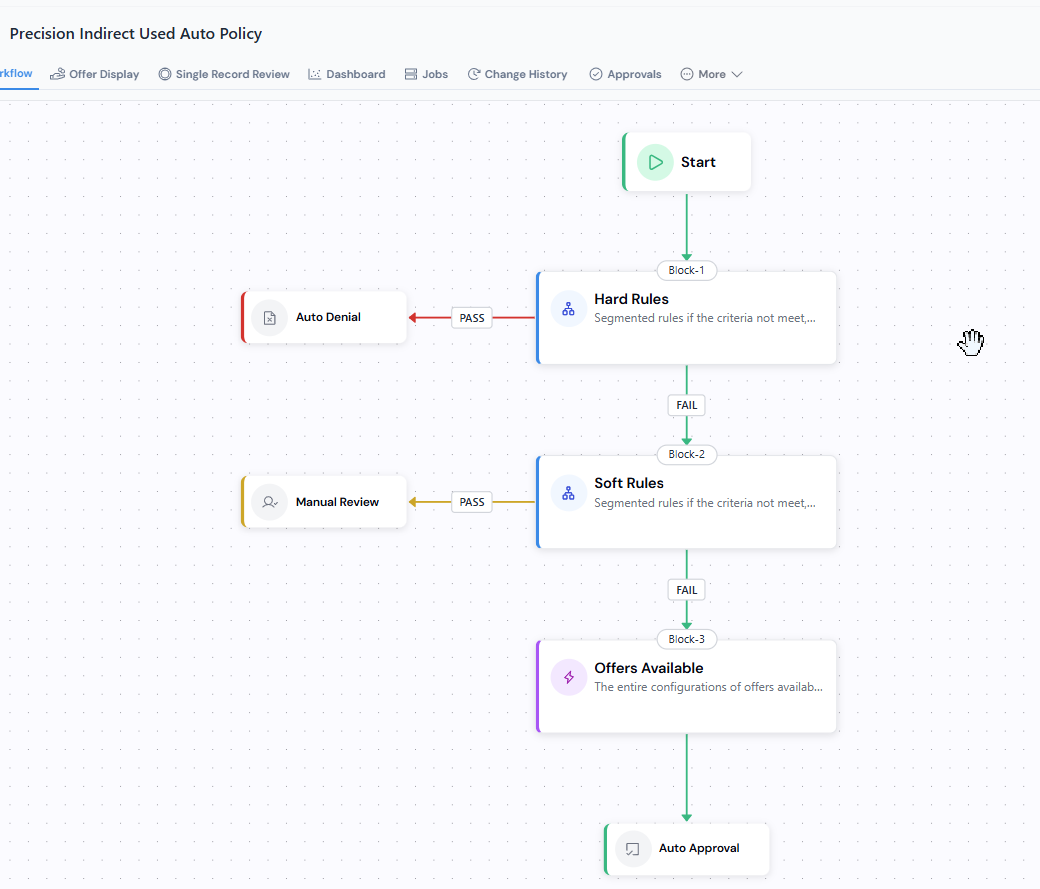
Adding Blocks
Click the connecting dots on the canvas to insert a new block. The platform shows only the block types that are valid at that position: the options depend on what comes before and what comes after. A few rules of thumb cover most cases:
- Application Decision blocks come first. They precede Offer Creation and never follow an offer-related block.
- Offer Creation can appear at most once, and only after the Application Decision phase. Once an Offer Filtering block exists, no further Offer Creation is allowed.
- Offer Filtering blocks follow Offer Creation and can be stacked. They cannot appear before Offer Creation or after Offer Optimization.
- Offer Optimization can appear at most once and sits at the end of the offer phase. Nothing offer-related can follow it.
- Derived Variable can be inserted almost anywhere — it produces a value, not a decision. It's the only block type that can be added after Offer Optimization.
Configuring Each Block
Click any block to open its configuration panel. What you configure depends on the block type.
Application Decision and Offer Filtering
Both block types share the rule builder. Each rule is a pass/fail condition over registered Data Elements, Features, or upstream Derived Variables. Combine rules with AND/OR, then map the pass and fail outcomes in Setting Pass/Fail Paths below.

Offer Creation
Define the possible values for each offer parameter (loan amount, interest rate, term, and so on). The platform generates every offer combination by taking the Cartesian product of the values you provide.
For example, with these parameters:
potential_loan_amount:10,000,15,000potential_term:24,36potential_interest_rate:0.05
the platform generates 4 offers (2 × 2 × 1):
| Offer | Potential Loan Amount | Potential Term | Potential Interest Rate |
|---|---|---|---|
| 1 | 10000 | 24 | 0.05 |
| 2 | 10000 | 36 | 0.05 |
| 3 | 15000 | 24 | 0.05 |
| 4 | 15000 | 36 | 0.05 |
These offers then flow into any Derived Variable, Offer Filtering, and Offer Optimization blocks that follow.
Derived Variable
Define a new calculated value that downstream blocks can reference. Fill in:
- Type: the output type (for example,
Numerical,String,Boolean). - Alias (required): the identifier the rest of the workflow uses to refer to this value.
- Description (required): a one-line plain-language explanation.
- Input: objects the definition reads. The dropdown lets you pick from offer config parameters, global variables defined in upstream Application Decision blocks, global functions, Data Elements, Features, and Models.
- Definition: the Python expression that returns the value.
Example: compute monthly payment from the Offer Creation parameters above.
| Field | Value |
|---|---|
| Type | Numerical |
| Alias | monthly_payment |
| Description | Monthly payment for the offer, derived from loan amount, term, and interest rate. |
| Input | potential_loan_amount, potential_term, potential_interest_rate |
| Definition | r = potential_interest_rate / 12n = potential_termp = potential_loan_amountreturn p * r * (1 + r) ** n / ((1 + r) ** n - 1) |
Downstream blocks (Offer Filtering, Offer Optimization) can then reference monthly_payment like any other input — for example, to filter out offers whose monthly payment exceeds a borrower's DTI cap.
Offer Optimization
Define the objective (for example, maximise return) and the selection logic. The block evaluates every remaining offer against the objective and picks one as the best-fit offer.
Offer presentation order is configured separately in the Offer Display tab, not as a workflow block.
Setting Pass/Fail Paths
Most blocks require you to define what happens when an application passes or fails the block's rules. For each outcome, you can configure:
- Auto Denial: the application is declined at this step.
- Manual Review: the application is routed for human review.
- Auto Approval: the application is approved at this step.
- Continue: the application moves to the next block.
Offer Creation and Derived Variable blocks do not have pass/fail paths: all records pass through them automatically.
Warning
The platform validates that every block has all required outcome paths defined before letting you save.
A Simple Example
Here is what a two-block underwriting workflow might look like:
- Block 1: Minimum Credit Eligibility Check (Application Decision): Applications with a FICO score below the threshold are auto-denied. Those that pass continue to Block 2.
- Block 2: Bureau Derogatory Limit Check (Application Decision): Applications with too many derogatory marks are sent to manual review. Those that pass are auto-approved.
You can expand this by adding an Offer Creation block after the Application Decision blocks, then layering in filtering and optimization logic.
To delete a block, click the delete option on the block. Note that deleting the Offer Creation block will also remove all offer-related blocks that follow it.
What You Can Do with a Policy
Once your workflow is saved, you have several options for testing and evaluating it:
Simulation Jobs
Run a Simulation job to execute your policy against a dataset and review the results in built-in dashboards. Dashboards include metrics like approval rates, offer distribution, and per-block outcomes.
Single Record Review
Use Single Record Review to trace how a single application moves through your decision workflow. You can see which rules passed or failed at each block, what offers were generated, what Derived Variable values were calculated, and the final outcome.
How to Read the Policy Output
Each simulation produces a row per application (or per application × offer, once offers are generated). The columns are emitted by the blocks in your workflow:
| Column | Emitted by | What it contains |
|---|---|---|
| application_decision_box_1, application_decision_box_2, … | Each Application Decision block, in order | The per-block outcome for that application: AUTO_DENIAL, MANUAL_REVIEW, AUTO_APPROVAL, or empty if the application never reached the block. |
| application_decision_output | Roll-up across all Application Decision blocks | The effective outcome from the Application Decision phase. Taken from the last non-empty application_decision_box_n column. |
| potential_loan_amount, potential_term, potential_interest_rate, … | Offer Creation | One column per offer parameter you configured. For applications that reach Offer Creation, each generated offer is a row. |
Derived Variable aliases (e.g. monthly_payment, apr) |
Each Derived Variable block | One column per Derived Variable, named with the alias you chose. Appears in the order the blocks are defined. |
| offer_filtering_box_1, offer_filtering_box_2, … | Each Offer Filtering block, in order | The per-block outcome on the offer: AUTO_DENIAL, MANUAL_REVIEW, AUTO_APPROVAL, or empty if the offer never reached the block. |
| offer_filtering_output | Roll-up across all Offer Filtering blocks | The effective outcome from the Offer Filtering phase, taken from the last non-empty offer_filtering_box_n column. |
| is_optimized | Offer Optimization | True for the offer the optimization block selected as best-fit, False for the rest. |
The same columns appear in Single Record Review, presented per-block so you can trace exactly where an application or offer was decided.
Next: Run a Simulation →