Register a Model
What is it?
The Model Registry is where you bring a trained model into Corridor as a governed object. Models built inside the platform in a Notebook or trained outside with your own tooling can both be registered. Once registered, they can be simulated, explained, approved, and used downstream.
A registered Model sits one layer above Features and Data Elements in the registry hierarchy:
Benefits of a registered Model
1. Reproducible scoring
The platform validates the model's expected inputs against the registered objects you select. Every simulation runs through the same scoring code path that production will use (no drift between "the notebook version" and "the deployed version").
2. Built-in governance
- Change management and version control: every edit to the Model is captured as a new version.
- Lineage: see exactly which Data Elements and Features feed the Model, and every Policy or downstream Model that consumes it.
- Permissible purpose: tag the Model so it can only be used in approved contexts (for example, restrict an
underwriting-tagged Model from a prospecting Policy). - Approval workflow: submit the Model for review, attach a simulation as evidence, and route it to the right reviewers before it can go live.
3. Explainability and monitoring out of the box
Enable a Model Explainer at registration time and every simulation produces per-prediction contributions or reason codes. Standard Model Quality reports (ROC/AUC, KS, lift, confusion matrix for classification; error distribution for regression) are generated automatically from each simulation.
How to Register
The form has five sections, and the steps below mirror them after the initial open step: Attributes, Input, Formula (model definition, optional explainer, optional transforms), Training & Validation Data (optional), and Properties.
Step 1: Open the Form
- From the home page, open Model Studio → Model Registry.
-
Click + New Model at the top right of the registry.
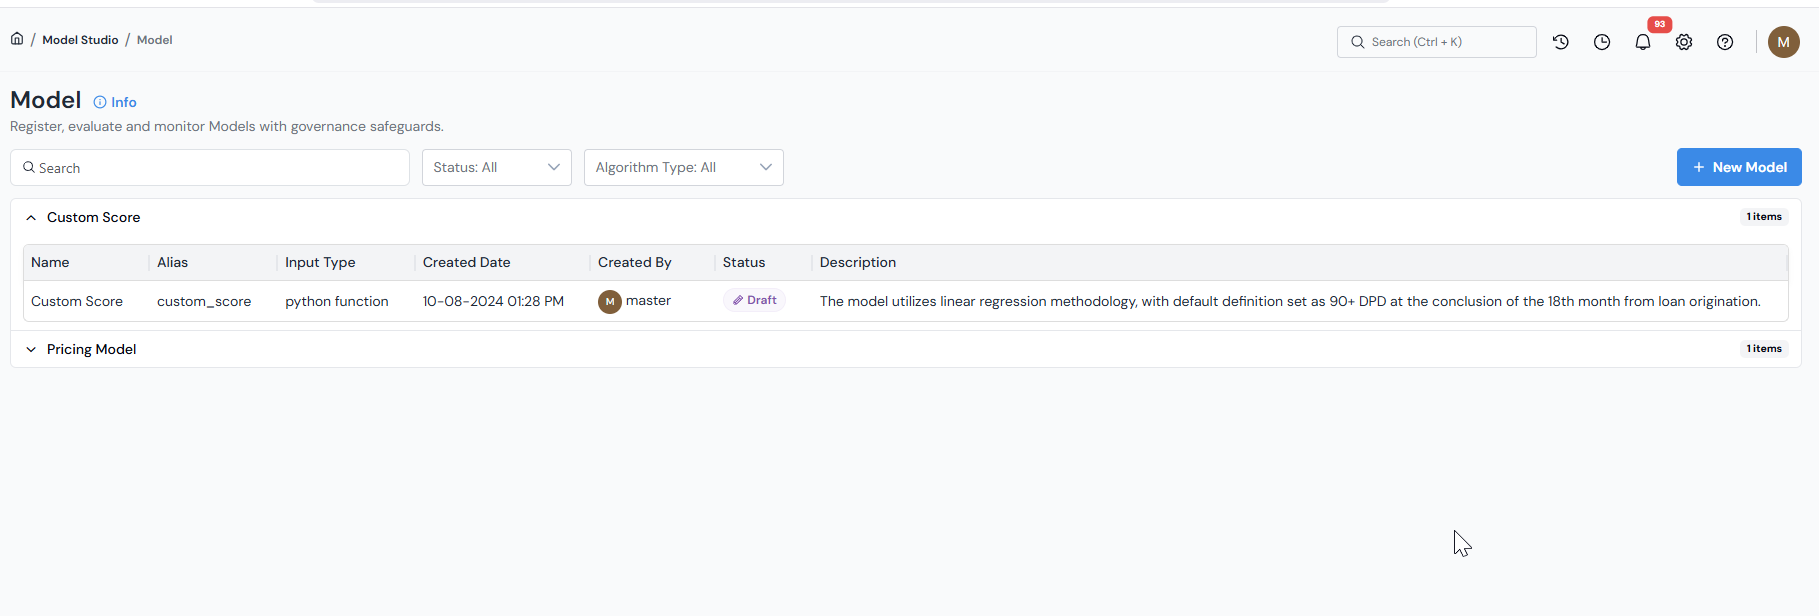
The Model Registry list is the entry point. Click + New Model to open the new Model form. -
Type a clear, descriptive name at the top of the form (for example,
Default Within 18 Months) and click ✓.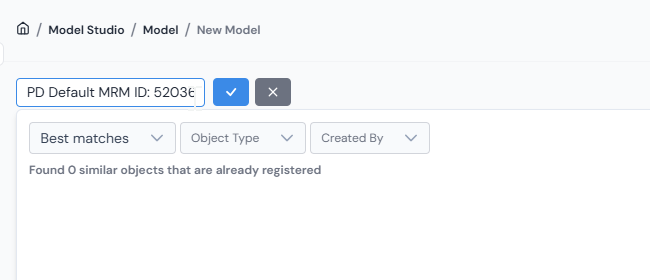
Give the Model a clear, descriptive name and confirm with ✓ before filling in the sections below.
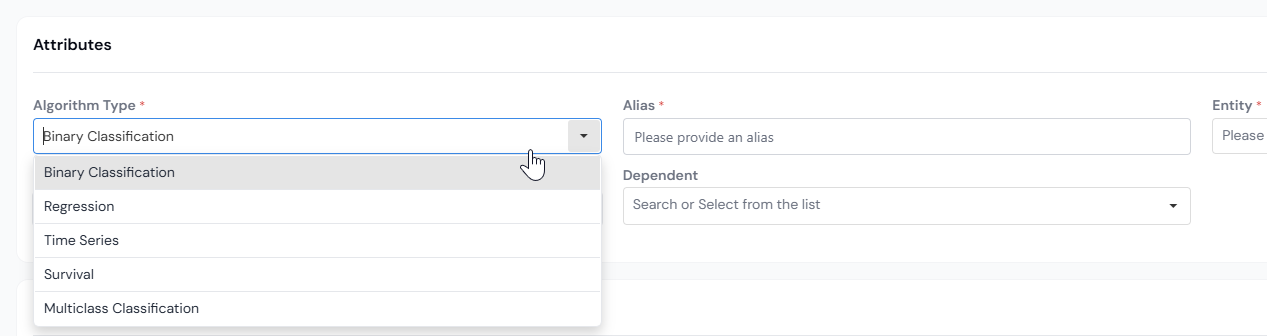
Step 3: Fill in Attributes
| Field | What to enter |
|---|---|
| Model TypeRequired | The type of prediction. Common values: Binary Classification, Regression, Time Series, Multi-class Classification. The chosen type drives the standard Model Quality report later. |
| Output Feature AliasRequired | The alias used to reference the model's output downstream (for example, default_within_18m_score). |
| EntityRequired | The entity the Model scores (Prospect, Application, Account, or Customer). |
| Output TypeRequired | The data type of the model's output (for example, Numerical for a probability, String for a class label). |
| Dependent | The target variable the Model is trained to predict. Optional but recommended (it is used by approval reviewers and downstream reports). |

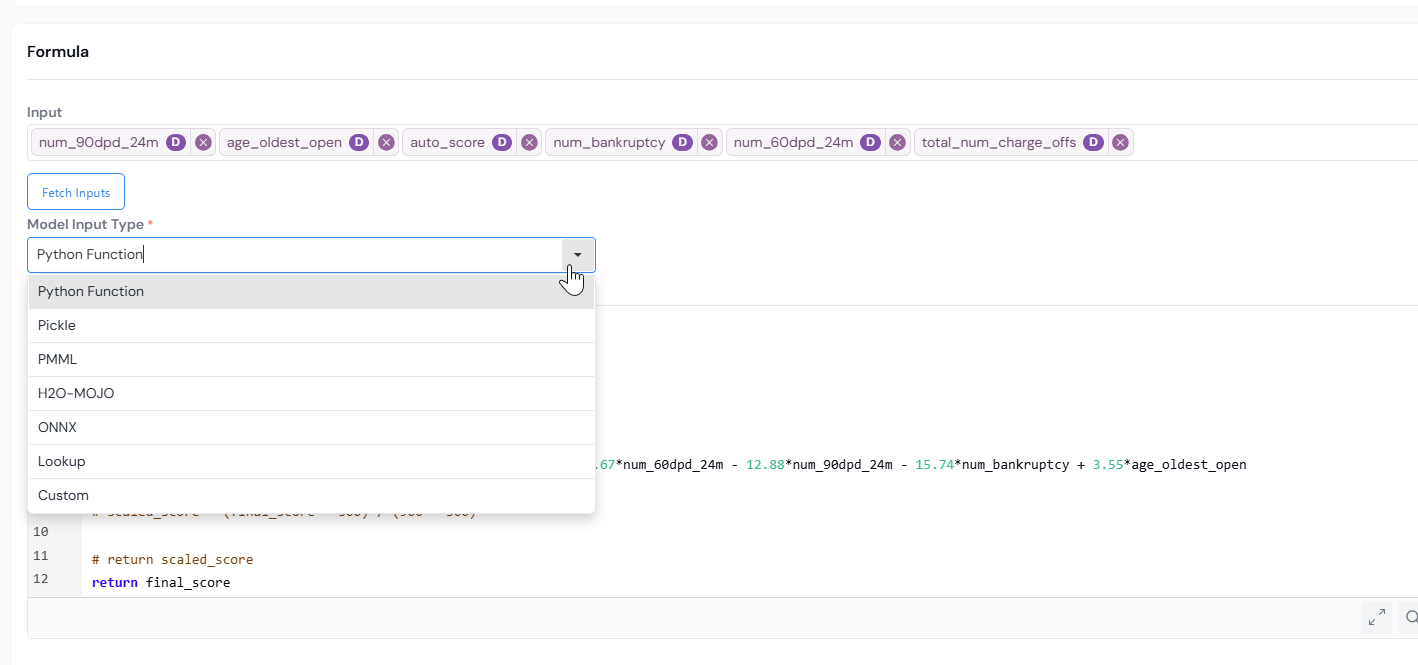
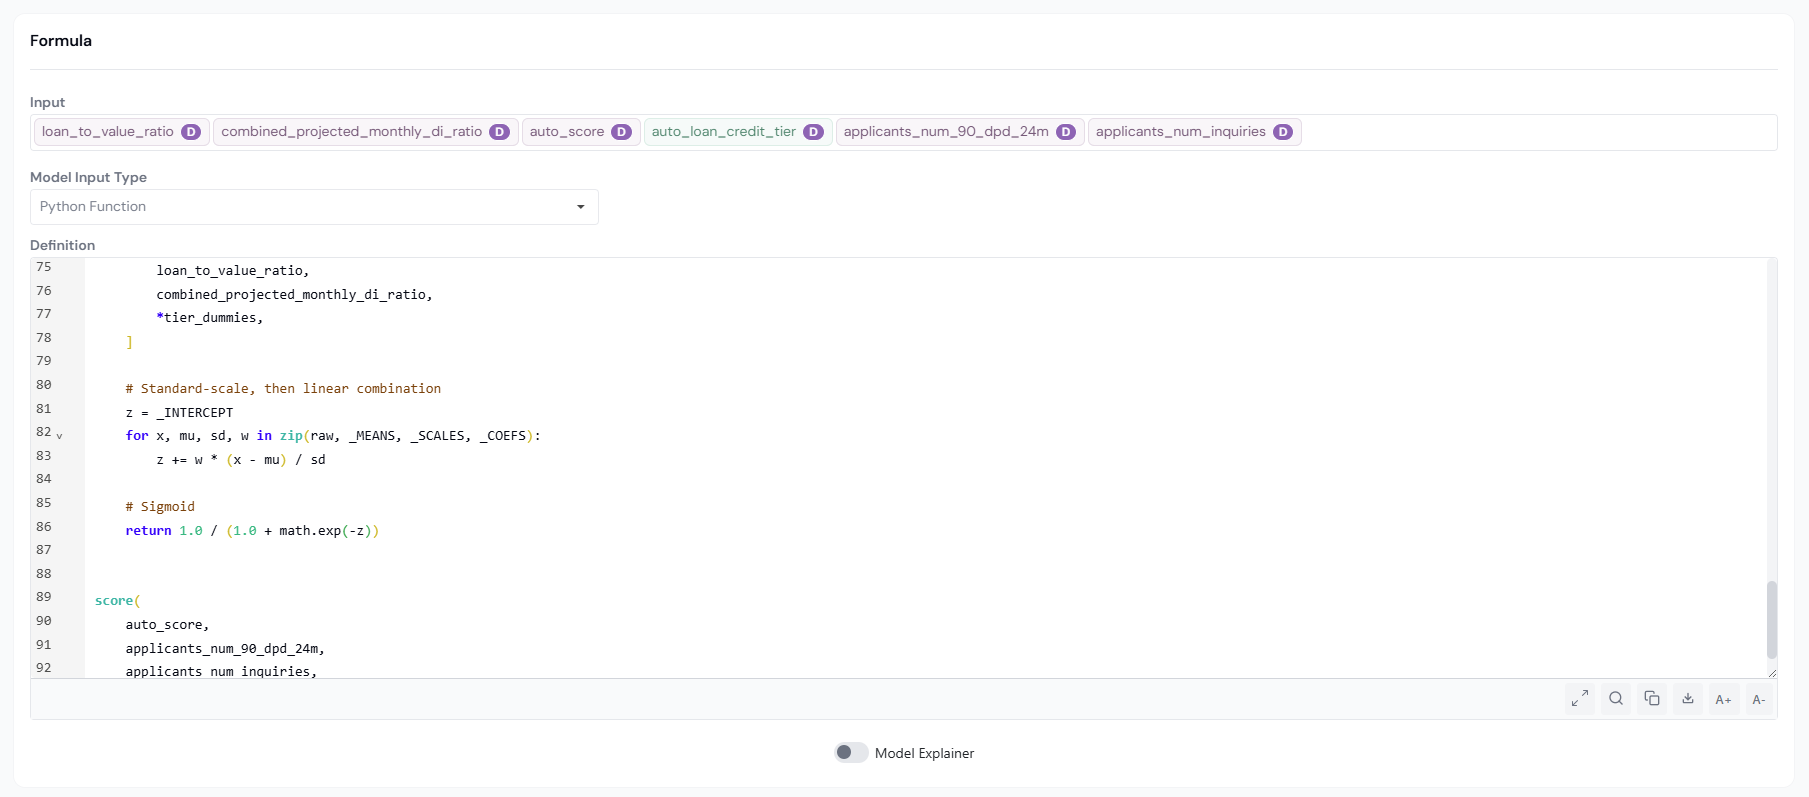
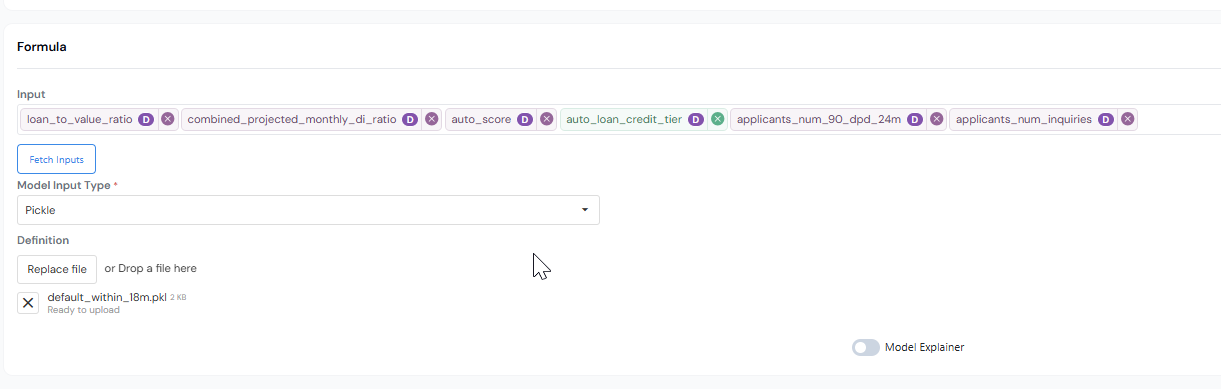
Step 3: Add Inputs
In the Input section, search and select the registered objects the Model consumes.
- Inputs can include Data Elements and Features. Models can also consume other Models as inputs (useful for stacked models or ONNX reader models).
- Only approved versions appear by default.
- Features and Data Elements are visually distinguished: Features are highlighted in green, Data Elements in purple.
- Each input is referenced inside the model definition by its alias.
The list of inputs you pick here is the contract the platform validates the uploaded model file against.
Paste in a list of inputs
If you already have the input list elsewhere (a notebook, a spec, an old model definition), paste it straight into the Input field. The platform resolves each name against the registry and adds the matching Data Elements and Features for you, so you don't have to search and click them in one by one.
Step 4: Fill in the Formula
The Formula section has three parts: the model definition (required), an optional Model Explainer, and optional Transforms. You fill them out in one pass without leaving the section.
Define the model
Pick the Model Input Type that matches your model and provide the file or logic.
Pick your format:
| Format | Use when |
|---|---|
| Python Function | The scoring logic is a self-contained Python function. |
| Pickle | The model is a serialized scikit-learn (or compatible) Python object. |
| PMML | The model is exported to PMML by tools like KNIME, R, or SAS. |
| H2O MOJO | The model was built in H2O or H2O Driverless AI. |
| ONNX | The model was exported from Keras, PyTorch, scikit-learn, or another framework supporting ONNX. Requires a two-step setup. |
| Custom | Any other framework (e.g. TensorFlow). You provide the model file, initialization logic, and scoring logic directly. |
Then follow the matching tab below.
- Provide the Python scoring function directly in the editor or upload the file containing it.
- Each input alias from Step 3 is passed as a Python value to your function.
- Click Test Syntax to validate.
- Upload the pickle file.
- Click Test Syntax to verify the model's expected inputs match the inputs you selected in Step 3.
- Resolve any mismatch by adjusting the Input section.
- Upload the
.pmmlfile. - Specify the Output Field:
- For classifiers, the probability column for one of the dependent classes.
- For regression, the predicted value column.
- Click Test Syntax to verify every declared input matches the file's expected inputs. Add or remove inputs in the Input section to resolve any mismatch.
- Upload the MOJO file (H2O or H2O Driverless AI).
- Click Test Syntax to verify inputs match.
- Resolve any mismatch by adjusting the Input section.
ONNX models are registered in two stages, because the raw ONNX output is an array.
Stage 1: Register the raw ONNX model (M1)
- Set Model Type to
Time Seriesso the array output is allowed. - Upload the ONNX file.
- Click Test Syntax to verify inputs.
- The Output Field is populated by the final layer name from the model build.
Stage 2: Register the output reader (M2)
Register a second Model (typically Binary Classification) whose Input includes M1. The reader reads the array from M1 and returns the element you want (for example, the first element as the probability).
Scikit-learn exported to ONNX
Scikit-learn models exported to ONNX return a class label, not a probability. The Output Field is the class column.
For frameworks not covered above (for example, TensorFlow), provide the following:
- Model File: upload the serialized model file.
- Initialization Logic: code that loads the model object once. Its return value becomes the
modelavailable in the scoring step. - Scoring Logic: code that takes the input aliases plus the initialized
modeland returns the prediction.
Click Test Syntax to validate.
Enable the Model Explainer (optional)
Toggle Model Explainer on if you want per-prediction contributions or reason codes.
| Field | What to enter |
|---|---|
| Explainer UsageRequired | Feature Importance to expose contributions per input (SHAP-style), or Reason Code to return a list of registered reason codes. |
| Explainer DefinitionRequired | Code that returns the explainer values. |
Variables available in the Explainer Definition.
- All input aliases from Step 3.
- A
modelvariable. Whatmodelis depends on the Model Input Type:- Pickle / PMML: the initialized model. You can call its native methods (for example,
model.predict_proba(...)). - Python / H2O MOJO / ONNX: the Python function defined for the model. Call it as
model(input1, input2, ...). - Custom: the return value of your Initialization Logic.
- Pickle / PMML: the initialized model. You can call its native methods (for example,
- For
Reason Code, a list of registered Reason Codes is also available.
Expected return value.
Feature Importance: a dictionary keyed by input alias, for examplereturn {'fico': shap_value_1, 'dti': shap_value_2, ...}.Reason Code: a list of registered reason codes.
If Explainer Usage is Feature Importance, you can also map each input to a registered reason code, so that downstream consumers can surface reason-code labels alongside contribution values.
Where the explainer values land
When the explainer is enabled, every model simulation writes a column named explainer_{model_alias} to the simulation output, alongside the inputs and the model output. The Feature Importance report is generated automatically from this column when Explainer Usage is Feature Importance.
Define Transforms (optional)
Transforms are calculations applied to a Model's inputs at score time. Use them when the model expects a transformed value (for example, bucketed flags) but only the raw Data Element or Feature is registered.
Click Create under Transforms to define a new transform. Each transform takes registered inputs and returns the value the model expects.
Transform vs. Feature
A Transform is specific to one Model and applied at the model's input boundary. A Feature is generic and reusable across many Models and Policies. If the same logic is useful in more than one place, register it as a Feature instead.
Step 5: Link Training & Validation Data (optional)
You can attach datasets used to develop the Model. These are surfaced to approvers and used by standard reports.
| Option | What it does |
|---|---|
| None | No training/validation dataset information attached. |
| Corridor Dataset | Pick a registered, approved Dataset. The Model cannot be approved unless its linked Datasets are also approved. |
| Record File Location | Specify one or more file paths in the data lake the platform reads from. Click Add to register each location. |
Step 6: Fill in Properties
| Field | What to enter |
|---|---|
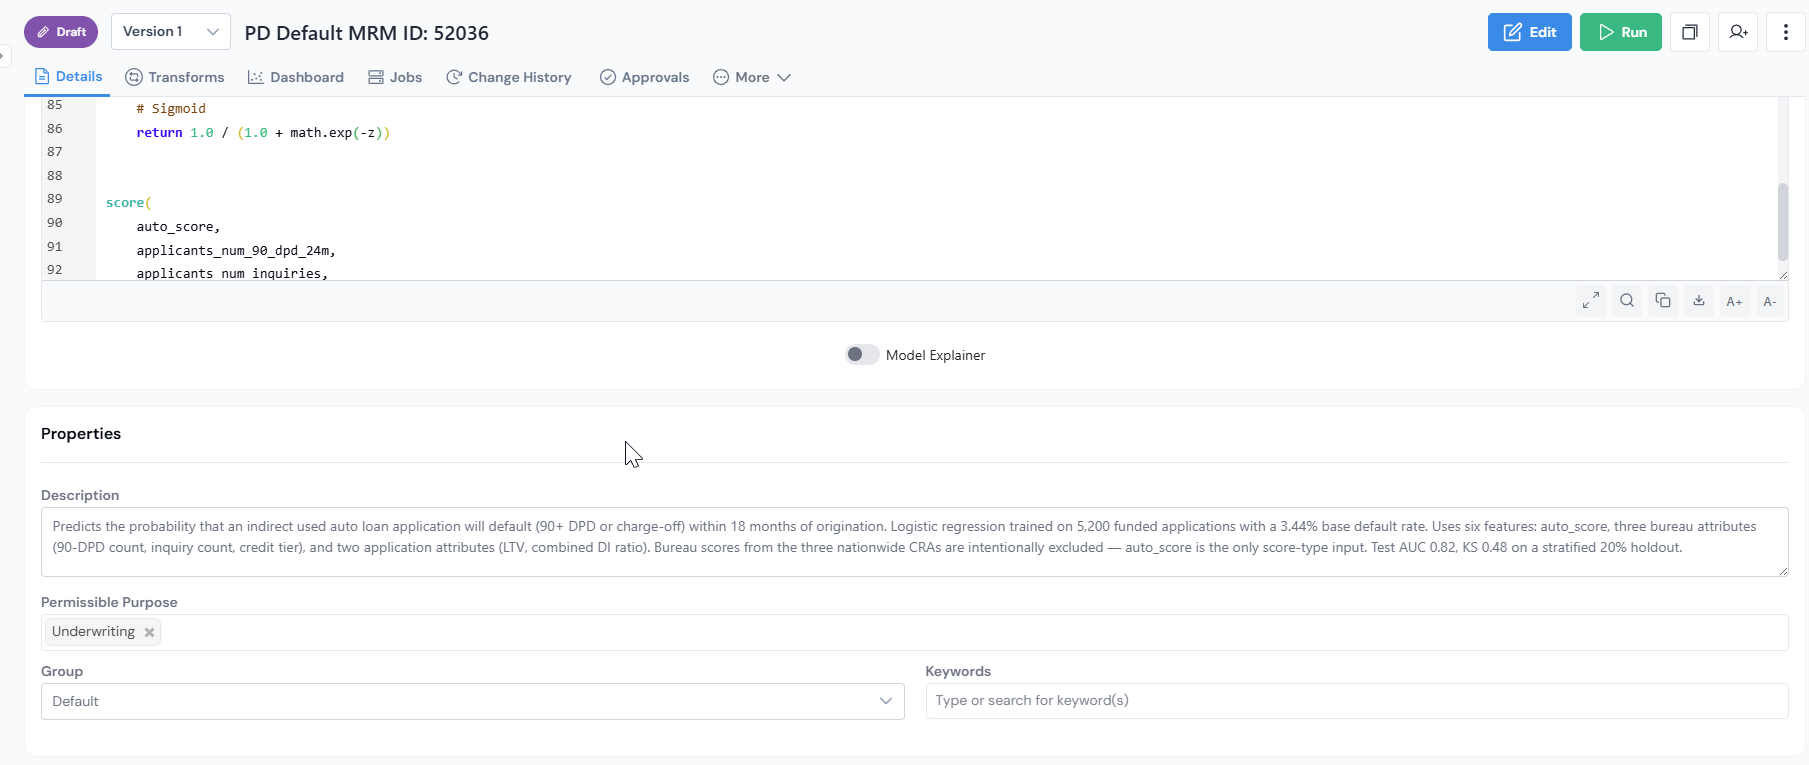
| DescriptionRequired | Plain-language explanation of what the Model predicts and how it was built. |
| GroupRequired | Logical grouping (for example, Default Models, Revolve Models). Models can only be compared against other Models in the same group. |
| Permissible PurposeRequired | Tags that control where the Model may be used (for example, Underwriting, Prospecting). Lineage flags any downstream Policy that violates these tags. |
| Approval Workflow | The set of users who collectively review and approve the Model. |
| Keywords | Free-form tags for search (for example, Self-Reported, XGBoost). |
You can also attach Additional Information in free-flow format (typically used to describe the training and validation samples for reviewers).
When all required sections are filled in, click Create at the bottom right of the form. The Model is saved as a draft and you land on its details page.
How can it be used?
Once registered, you can:
- Run a Simulation to score the Model on a sample. The Model Quality report (ROC/AUC, KS, lift, confusion matrix for classification; error distribution for regression) is generated automatically. If the Explainer is enabled, the Feature Importance report is generated alongside.
- Use the Model downstream in Policies, Features, and other Models (for example, an ONNX reader Model).
- Track its lineage to see every input it reads from and every object that consumes it, plus permissible-purpose flags.
What's Next
- Run a Simulation on the Model to validate it on a representative sample.
- Send the Model for approval so it can be used outside your draft workspace.
- Use the approved Model in a Policy.